Ever wondered how to measure the flatness of CNC parts accurately? As a seasoned CNC parts manufacturer with years of experience, I’m here to share some insights. Trust me, after countless flatness checks, I’ve seen it all!
Flatness measurement isn’t just a fancy term we throw around. It’s a crucial part of ensuring that your CNC parts fit and function perfectly. So, grab a cup of coffee, and let’s dive into the essentials of measuring flatness!
What is Flatness in GD&T?
Flatness in Geometric Dimensioning and Tolerancing (GD&T) refers to the condition of a surface being equidistant from a perfect plane at all points. It measures the deviation of a surface from an ideal flat plane. This is crucial when two surfaces must fit together precisely, ensuring there are no high or low spots. Flatness is an independent characteristic, meaning it doesn’t reference other features or datums, focusing solely on the surface’s condition.
Flatness Symbol
In GD&T, flatness is represented by a parallelogram symbol, as shown here. The flatness symbol must be accompanied by a tolerance value to its right. This value specifies the allowable deviation of the surface from the ideal flat plane.
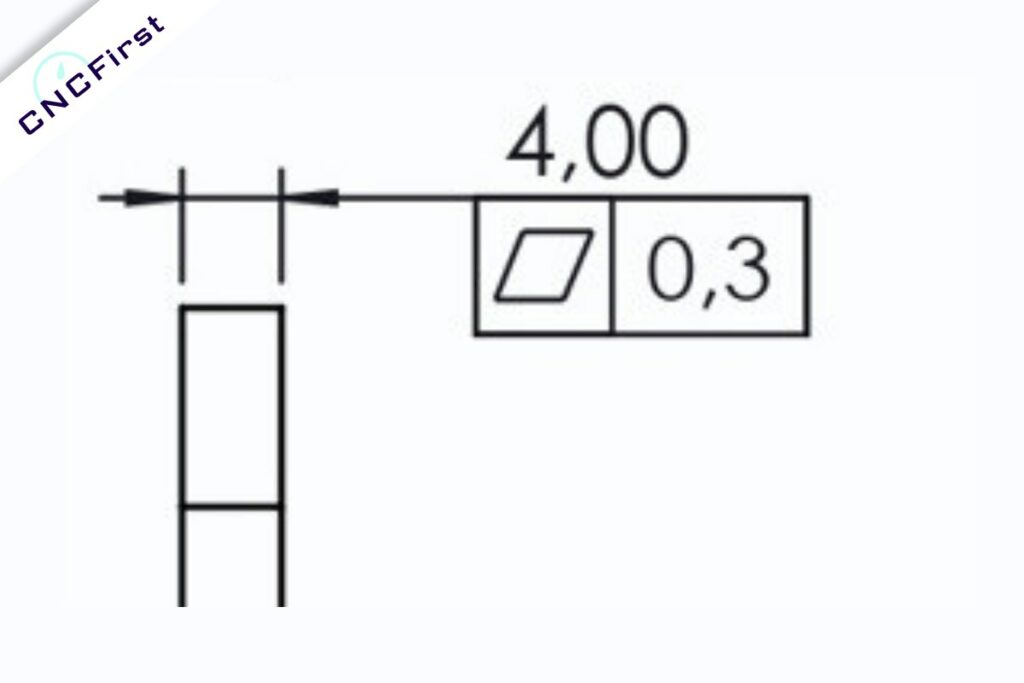
Flatness in GD&T has a 3D tolerance zone visualized as two parallel planes separated by the specified tolerance value. If all measured points on the surface fall within this zone (between these two parallel planes), the part meets the defined quality standards.
Two Common Methods to Measure Flatness
Measuring the flatness of the surface and detecting defects immediately after the production process is becoming increasingly important. The common methods for measuring flatness are probe coordinate measuring machines and optical interferometry. Both methods have their advantages and limitations.
1. Coordinate Measuring Machine (CMM) Probe Measurement
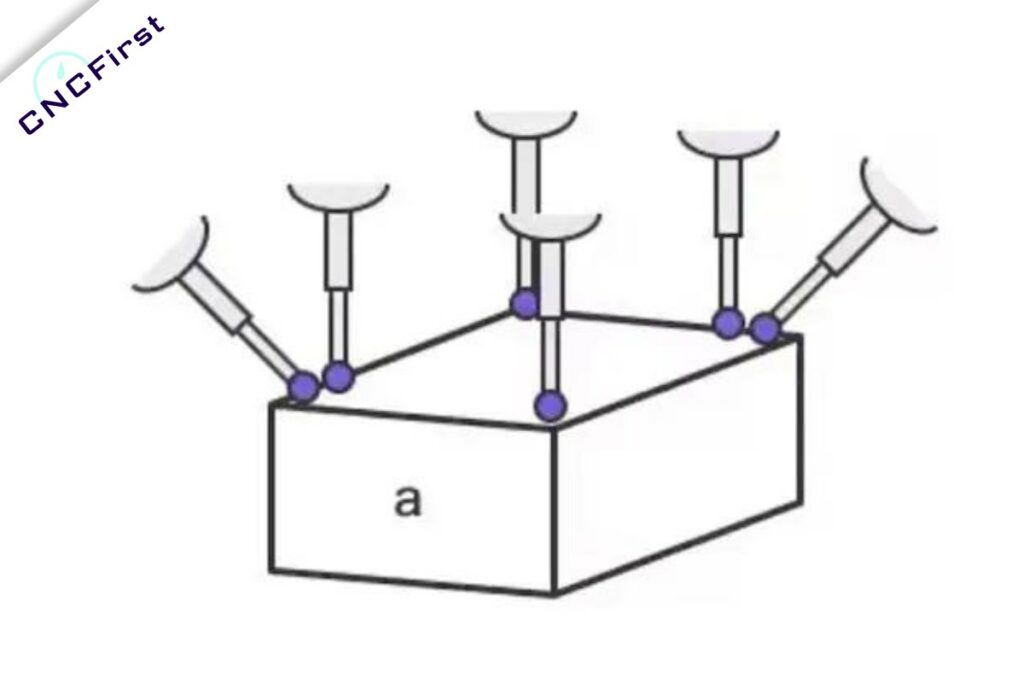
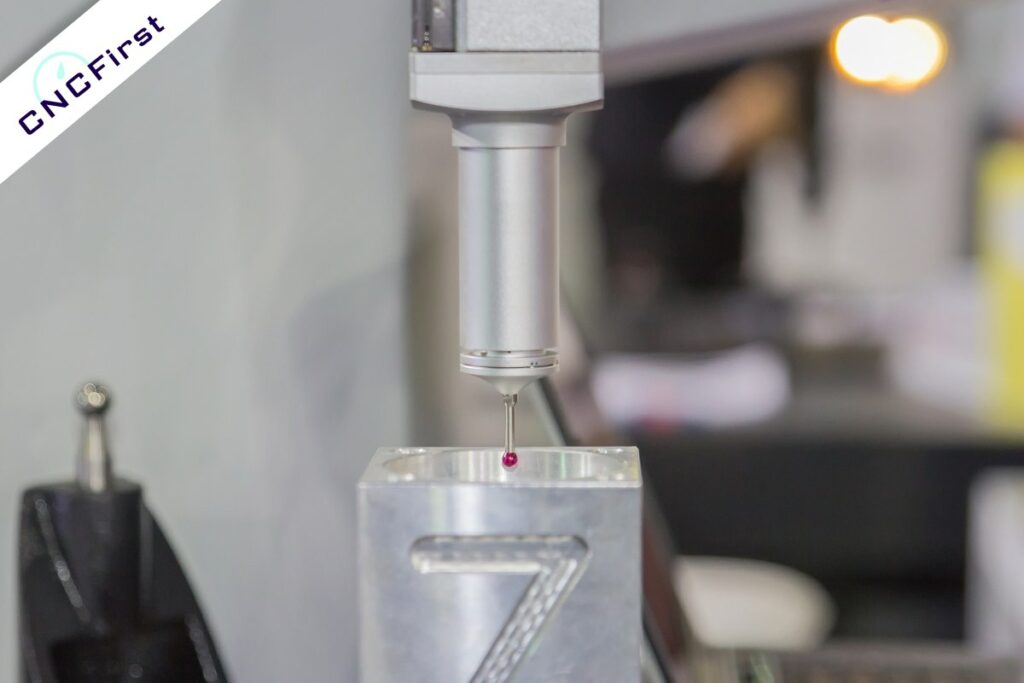
The probe method uses a contact ruby ball probe to sample multiple points on a surface, obtaining limited coordinate data to calculate flatness.
As shown below, the probe touches four or more points to measure flatness. Increasing the number of measurement points ensures precise, stable measurements, even over wide areas.
Coordinate measuring machines (CMM) are versatile, commonly controlling all dimensions of a part. The process of measure flatness is slow, and the probe might not reach small or confined areas. However, CMMs offer high measurement accuracy. Selecting the right number of points is crucial to minimize errors and can be determined through sample experiments.
Step-by-Step Process:
Setup and Calibration:
- Start by placing the CNC part on the CMM’s measurement table.
- Calibrate the CMM to ensure accurate measurements. This involves zeroing the machine and setting reference points.
Defining Measurement Points:
Using the CMM software, define the grid or pattern of points where measurements will be taken. This grid should cover the entire surface area to get a comprehensive flatness profile.
Probe Measurement:
- The CMM uses a probe to touch various points on the surface of the CNC part.
- The probe records the coordinates of each point, capturing deviations from the ideal flat plane.
Data Collection:
- The CMM software collects and compiles the data from each measured point.
- The software then compares these points to the defined flat plane, calculating the deviations.
Analysis and Reporting:
- Analyze the data to determine if the surface meets the flatness tolerance.
- Generate a detailed report showing the flatness profile and any deviations.
Benefits of the CMM Measurement Method
- High Precision: CMMs provide extremely accurate measurements, making them ideal for parts requiring tight tolerances.
- Automated Process: Automated probing and data collection reduce human error and increase efficiency.
- Comprehensive Data: CMMs can measure complex surfaces and provide detailed reports on surface deviations.
- Versatility: CMMs can measure flatness as well as other geometric features like angles and diameters.
2. Measuring Flatness with Optical Flats
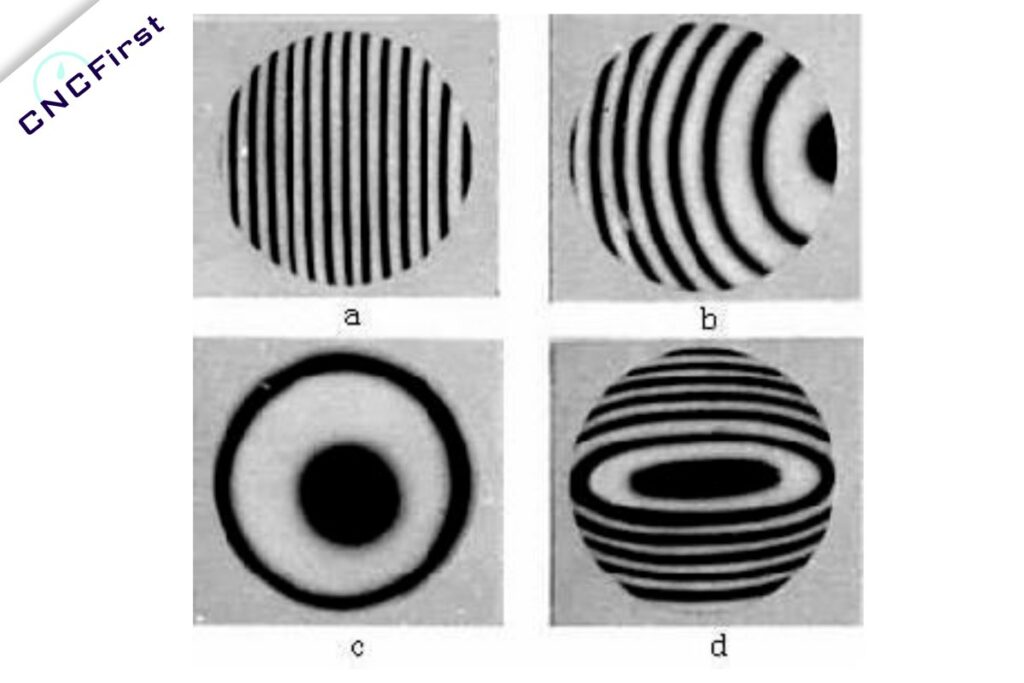
Optical interferometry measures flatness by using two light beams, typically split from one source, to create interference patterns when they overlap.
Due to the short wavelength of visible light, tiny differences in the travel distance of the beams result in noticeable changes in the interference pattern. This high sensitivity allows for detecting minute variations in flatness.
Optical interferometry has been a valuable measurement technique for over a century, and its accuracy has improved significantly with the advent of lasers, making it even more reliable for precision measurements.
Step-by-Step Process:
Surface Preparation:
- Ensure the CNC part’s surface is clean and free of debris, oil, or other contaminants.
- Place the part on a stable, vibration-free surface.
Optical Flat Placement:
- Gently place the optical flat (a precisely ground glass disk) on the surface of the part.
- Ensure there is no air gap or particles between the optical flat and the part surface.
Light Source Application:
- Direct monochromatic light (usually from a sodium or LED light source) at the optical flat and the part surface.
- The light will create interference fringes (patterns of dark and light bands) due to the slight air gap between the optical flat and the part surface.
Fringe Pattern Analysis:
- Observe the interference fringes. A perfectly flat surface will produce straight and evenly spaced fringes.
- Deviations in flatness will cause the fringes to bend, curve, or change spacing.
Data Interpretation:
- Analyze the fringe patterns to determine the degree of flatness.
- Count the number of fringes and their deviation to quantify the flatness error.
Benefits of Optical Flats Measurement Method:
- High Accuracy: Optical flats provide highly accurate measurements of flatness, ideal for high-precision applications.
- Non-Contact Measurement: This method is non-invasive and doesn’t risk damaging the part.
- Visual Feedback: The interference fringes provide immediate visual feedback on the flatness condition.
- Cost-Effective: Optical flats are relatively inexpensive compared to other high-precision measurement tools.
Both methods are essential in the manufacturing industry, ensuring that CNC parts meet the required flatness specifications for optimal performance and reliability.
Conclusion
Measuring flatness is crucial for ensuring the precision and performance of CNC parts. By using advanced methods like Coordinate Measuring Machines (CMM) and Optical Flats, you can achieve highly accurate measurements and maintain quality standards. Understanding and implementing these techniques will help you produce superior CNC parts that meet strict tolerance requirements.
Ready to take your CNC machining to the next level? Contact us today for custom CNC parts. As a professional provider of CNC machining services in China, we’re here to help you achieve the highest standards in precision and quality. Let’s create something exceptional together!
FAQ: Flatness vs Parallelism: What’s the Difference?
Flatness and parallelism are distinct concepts in Geometric Dimensioning and Tolerancing (GD&T). Flatness measures how close a surface is to a perfect plane, ensuring there are no high or low spots. It is an independent characteristic and does not reference any other features.
Parallelism, on the other hand, measures how two surfaces, lines, or axes are equidistant from each other across their entire length. It requires a reference feature or datum. Essentially, flatness ensures a single surface’s uniformity, while parallelism ensures consistent spacing between two features.

