Why Do We Still Need Technical Drawings When We Have 3D CAD?
In CNC machining, a clear technical drawing often determines the success or machining quality of CNC machined parts.
While a cad model design provides a visual blueprint, a technical drawing for CNC machining is the universal language that enables clear communication of technical requirements between design and CNC machining.
It reduces interpretation errors, clearly defines key tolerances, and ensures that dimensions, surface finishes, and material specifications meet your requirements.
No matter how advanced a 3D file is, it cannot replace the role of a well-structured technical drawing.
A proper drawing not only provides clear machining instructions but also helps prevent costly rework caused by misinterpretations.
How can CNCFirst help you?
As a CNC precision parts manufacturer serving global customers, we have seen many production issues caused by incomplete technical drawings.
These include dimensional errors leading to scrapped parts, unclear annotations causing repeated communication, and material confusion increasing costs. Such avoidable mistakes often result in significant delivery delays.
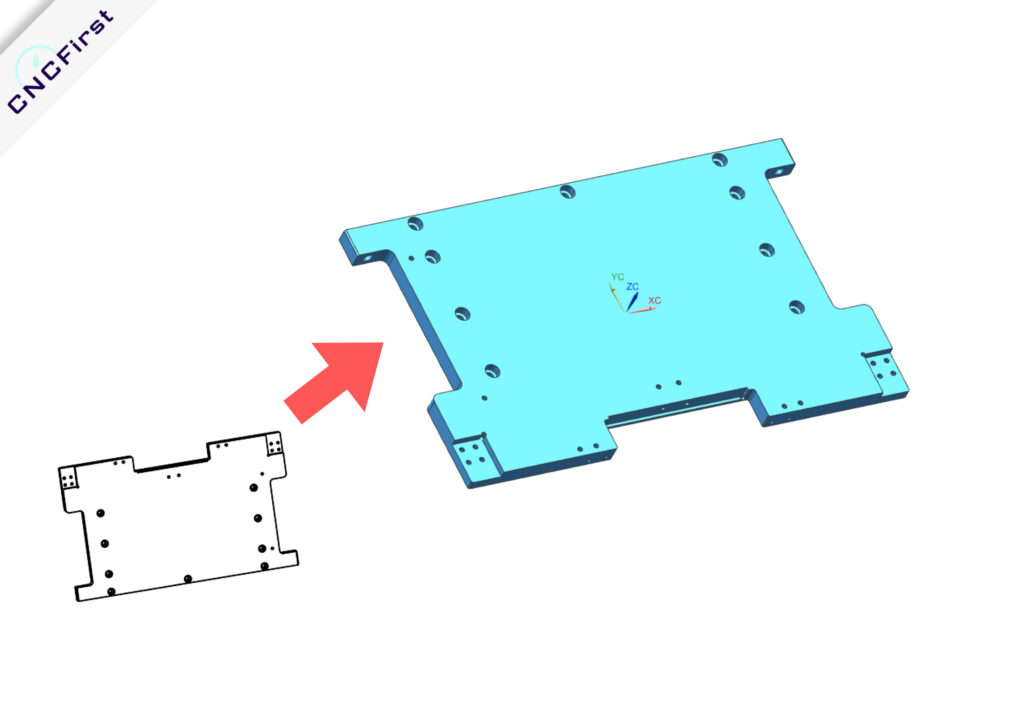
In this article, we will explore:
- Why technical drawings remain irreplaceable?
- The key elements of a good technical drawing?
- How to create a technical drawing that meets CNC machining requirements?
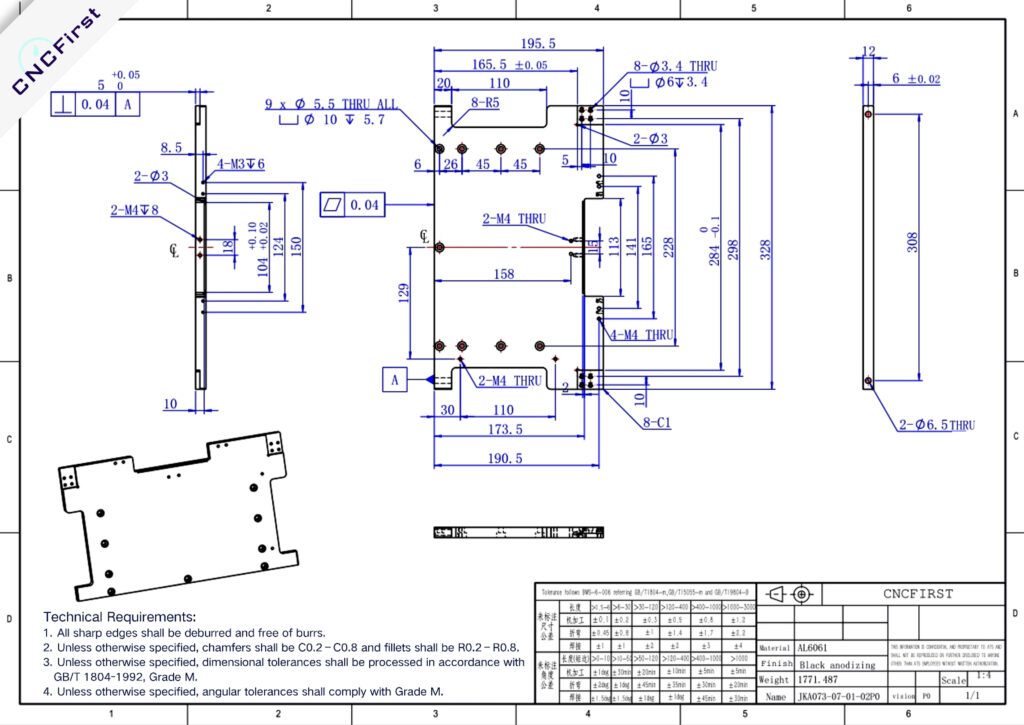
How Do Technical Drawings Affect CNC Quality?
In CNC machining, 3D CAD files accurately display a part’s geometry, but they do not guarantee that the design will be manufactured as intended.
Technical drawings remain a crucial tool for ensuring machining quality, as they convey information that 3D CAD files cannot, such as:
- Thread details (internal/external thread type, specifications, tolerances)
- Non-standard tolerances (high-precision dimensions and fit requirements for critical areas)
- Surface treatment (such as smoothness, plating, oxidation, heat treatment)
- Material and hardness requirements (material type, hardness level, heat treatment method)
- Assembly references (part assembly direction, positioning holes, reference surfaces)
- Geometric dimensioning and tolerancing (concentricity, perpendicularity, flatness, etc.)
- Inspection standards (measurement methods, inspection tools, sample or full inspection requirements)
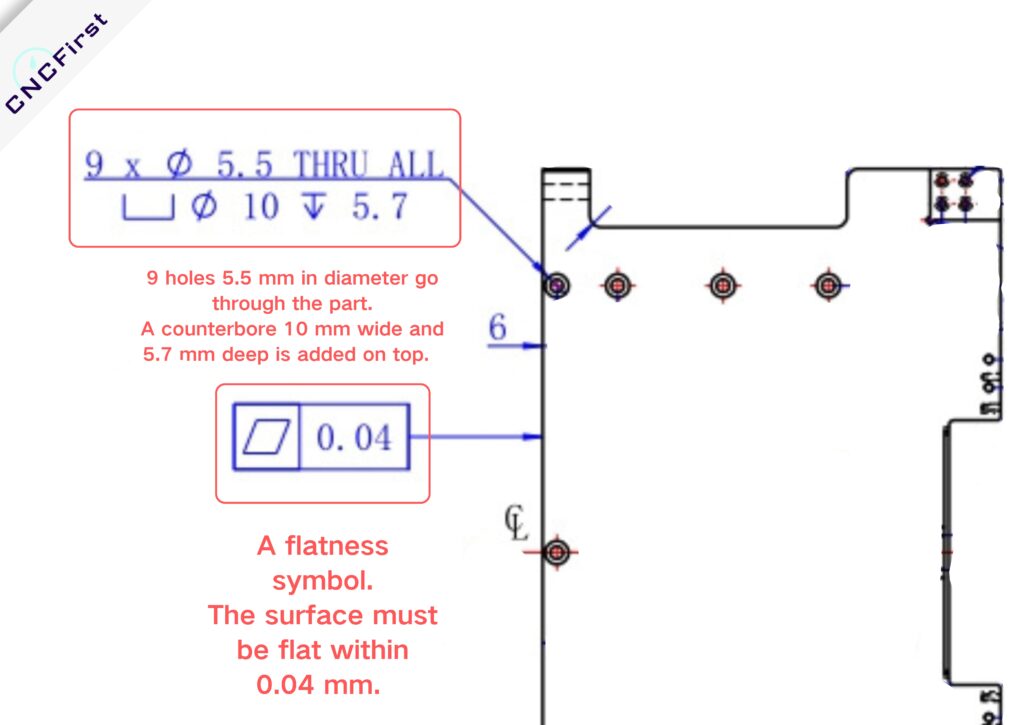
Moreover, many CNC suppliers still rely more on 2D technical drawings, because for precise communication of tolerances and surfaces, a 2D drawing is needed.
First, 2D drawings present dimensions, tolerances, and machining requirements more clearly.
Engineers can quickly access key information without constantly rotating a 3D model or measuring geometric data, improving efficiency.
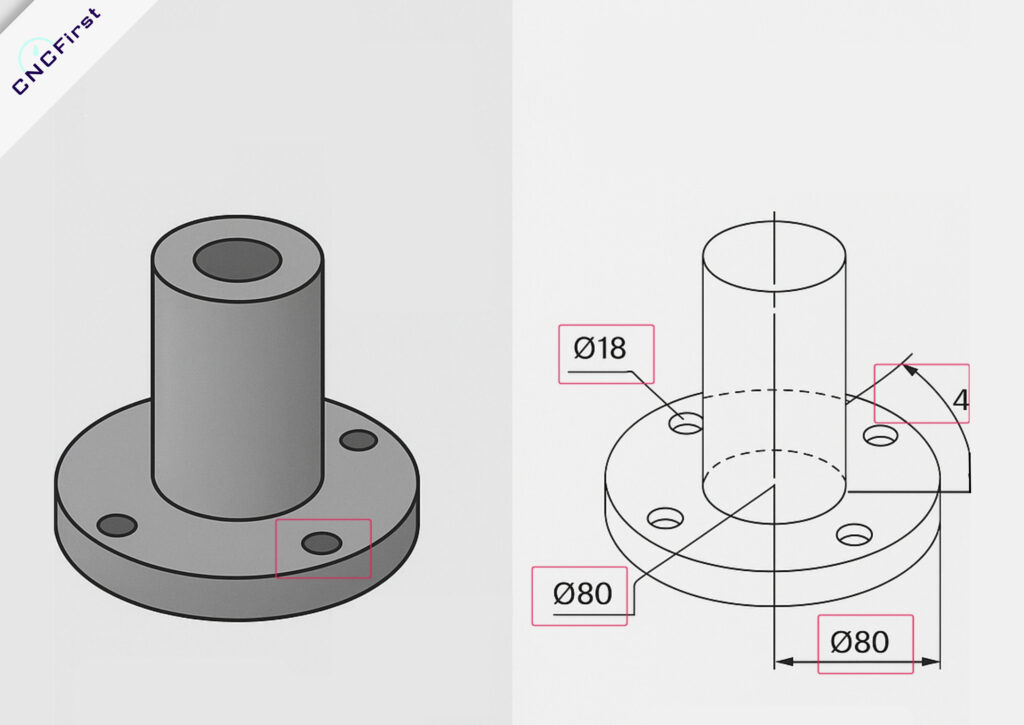
Second, 2D drawings help with cost evaluation.
They highlight critical machining areas and required surface treatments, allowing suppliers to accurately assess relevant information and requirements, such as manufacturing complexity, optimize machining processes, and provide reasonable quotes.
In contrast, relying only on a 3D model may lead to overlooked tolerance requirements or special processing needs, causing cost estimation errors.
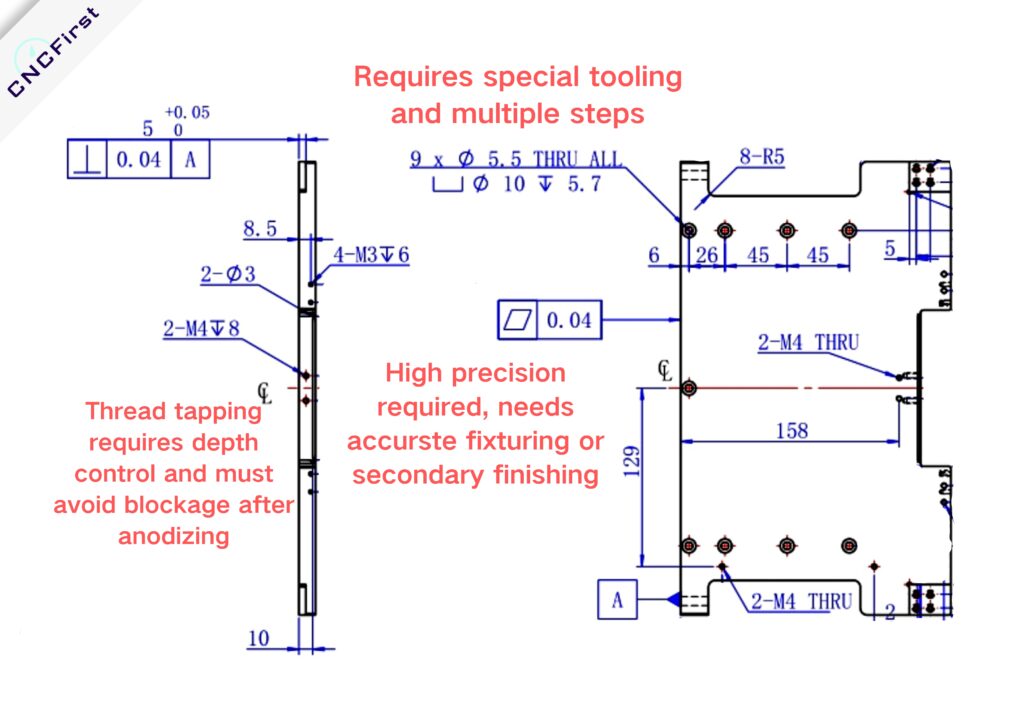
Most importantly, 2D technical drawings serve as standard documents in CNC workshops and quality control.
From machinist to quality inspectors, every step relies on these drawings to check dimensions, tolerances, and assembly requirements.
This prevents misinterpretations that could lead to rework or assembly issues. For mass production, maintaining consistency is essential—it reduces defect rates and improves delivery efficiency.
Key Elements of a Technical Drawing
A standard CNC technical drawing should include the following essential parts:
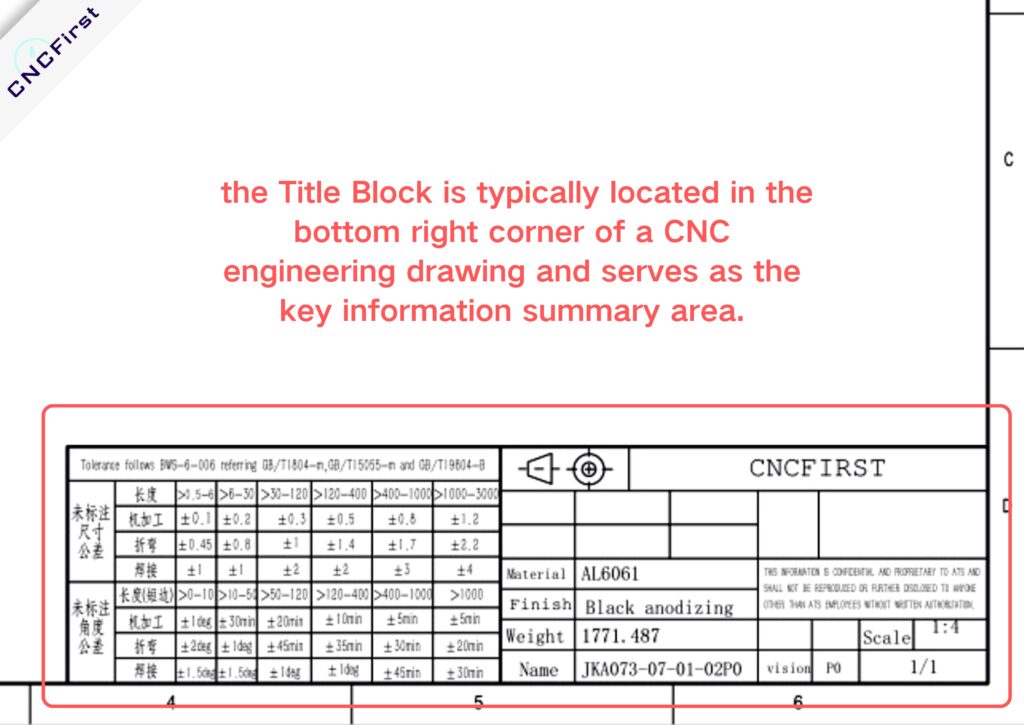
1. Title Block
Part Information (Name, Part Number, Material, Surface Treatment, Color)
Design Information (Designer, Company, Date)
Technical Information (Drawing Scale, Dimension, and Tolerance Standards)
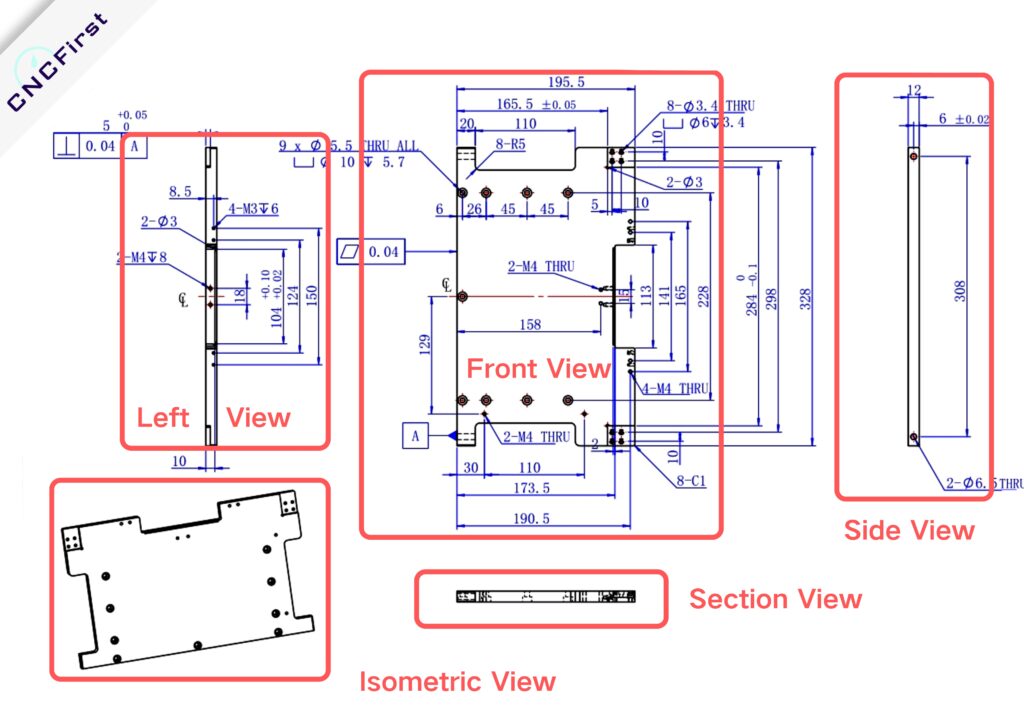
2. Types of Views
Isometric View / Graphic View: A 3D perspective that provides an overall reference for understanding the part’s shape, usually placed in the lower-left corner of the drawing.
Main Orthographic Views, including front, side, and top views, help present important views and place of the part’s geometry, ensuring key features are well understood for machining.
Section View: Shows internal features and structures by cutting through the part, revealing hidden holes, slots, wall thickness, and other critical machining details. Commonly used for complex parts.
Detail View: Enlarges intricate areas such as small threads, chamfers, and fine curves to ensure precise annotations.
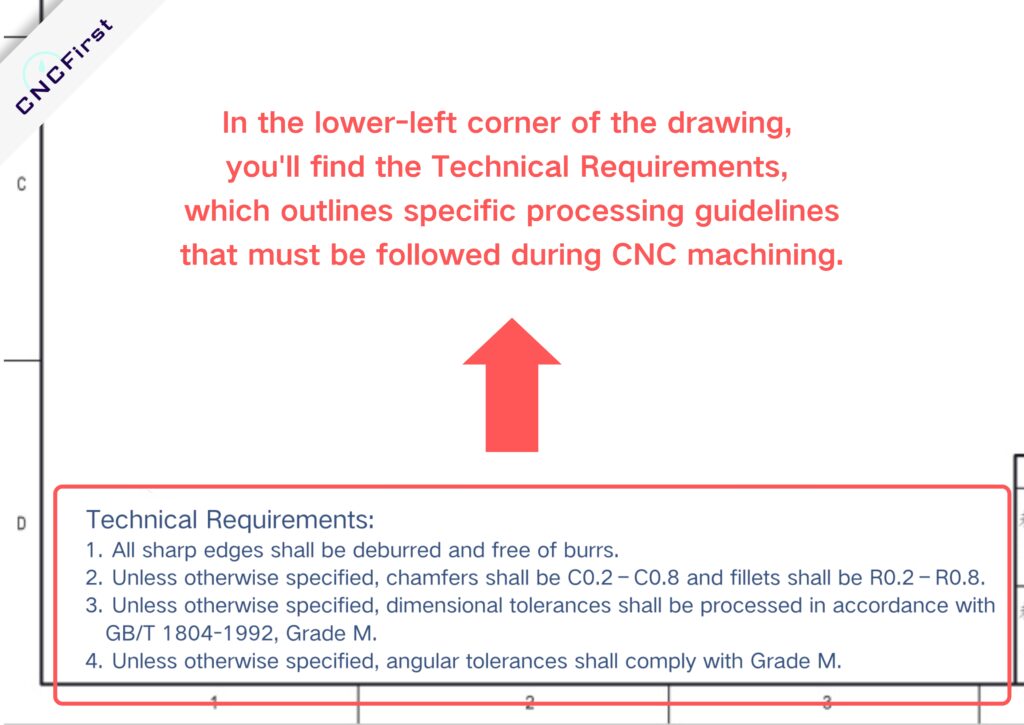
3.Manufacturer Notes
The manufacturer notes supplement the title block by covering relevant information and requirements such as machining, inspection, assembly, and delivery details.
They ensure CNC suppliers accurately understand the design intent.
The main points include:
1. Key Machining Requirements
Specify clamping and assembly references, such as:
“All machining dimensions are measured based on surface A” or specify the assembly basis, such as the reference hole needs to be processed first.
State requirements for EDM, grinding, and thin-wall machining, such as “For wall thickness less than 1mm, use low-speed cutting.”
Indicate interference and clearance fits, such as “Shaft Ø10 g6 and hole Ø10 H7 must be checked for proper fit.”
2. Quality Inspection and Acceptance
Critical dimension inspection: Tolerance ≤ ±0.02mm requires 100% inspection, with specified measuring tools (e.g., CMM coordinate measuring machine).
Surface quality and surface roughness: No scratches, dents, or machining marks; deburring and chamfering must follow the design specifications, and required surface roughness values should be clearly defined.
Material verification: Suppliers must provide material certification (EN10204 3.1), and heat-treated parts require a hardness test report.
Curious about the cost of CNC machining?
3. Delivery and Packaging Requirements
Protection measures: Steel parts must be coated with anti-rust oil, and precision surfaces should be protected with foam padding to prevent damage during transport.
Labeling and traceability: Packaging must clearly indicate part number, batch number, and quantity to ensure traceability.
How to Create a Standard CNC Technical Drawing?
Follow these steps to prepare a technical drawing that meets ISO, GD&T, and other industry standards.
1.Choose the Right View Layout
In CAD software (e.g., SolidWorks, AutoCAD, Siemens NX), start with the front view and then add other views as needed to ensure all critical features are clearly visible.
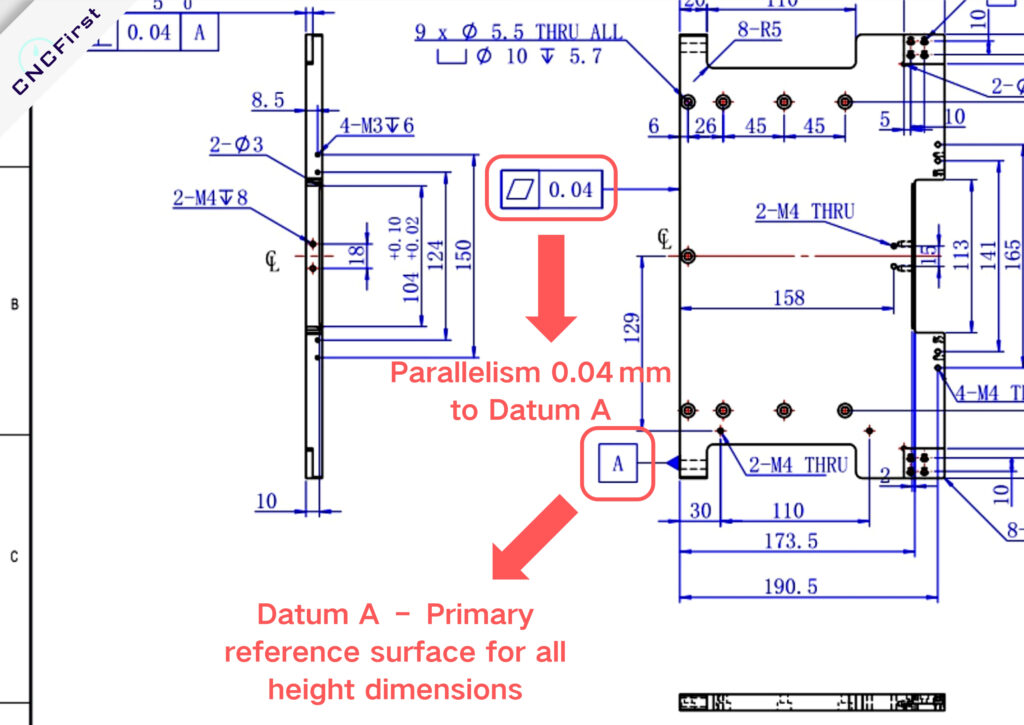
2.Add Reference Datums
Choose appropriate reference surfaces (such as the part’s outer profile, mounting surface, or positioning holes).
Use datum symbols (e.g., A, B, C) to indicate reference points and ensure all dimensions are measured from these fixed references.
Avoid floating datums, as undefined references can lead to machining and measurement errors.
For shaft parts, the centerline is typically the primary datum, with all other features measured relative to it.
3.Mark Key Dimensions
After preparing a draft, engineers can refine dimensions and features to meet CNC machining needs more precisely.
For assembly parts, prioritize marking screw holes, pin holes, and alignment references to prevent assembly errors. Make sure to add dimensions to these features clearly to avoid misinterpretation during CNC machining.
In CNC machining, assembly-related dimensions should be clearly shown in the front or top view and should include GD&T (Geometric Dimensioning and Tolerancing) to ensure machining accuracy.
4.Define Threads and Holes
Threads and holes should include quantity, diameter, tolerance, and depth to ensure correct machining and assembly.
5.Specify Tolerances
Common tolerance types include
Dimensional Tolerance (±0.05mm): Controls the allowable variation in size.
Geometric Tolerance (GD&T): Defines position tolerance, parallelism, concentricity, etc., to improve assembly precision.
Fit Tolerance (H7/g6): Ensures correct shaft-to-hole fitting with proper clearance or interference.
Standard tolerance guidelines (e.g., ISO 2768-mK or ASME Y14.5) should be clearly stated in the title block or technical notes so that manufacturers can follow them accurately.
6.Fill in the Title Block
In CAD software (e.g., SolidWorks, AutoCAD, UG NX), set up a standardized title block template to keep drawing formats consistent and minimize manual errors.
7.Export as PDF and Verify Completeness
Checklist before finalizing:
Pro tip from CNCFirst
All key dimensions are labeled, nothing missing.Holes, tolerances, and thread details are complete and accurate.Technical requirements (deburring, surface treatment) are clearly stated.Title block information is correct, and version numbers match.
Use PDF review tools or test print the drawing to ensure that dimensions and text are clear before submission.
Is Your Technical Drawing Clear Enough?
Have you ever faced machining issues due to incomplete annotations?
Feel free to share your experiences or questions with us!
We provide professional CNC manufacturing advice and can help you optimize your technical drawings for more efficient and precise CNC parts production.
